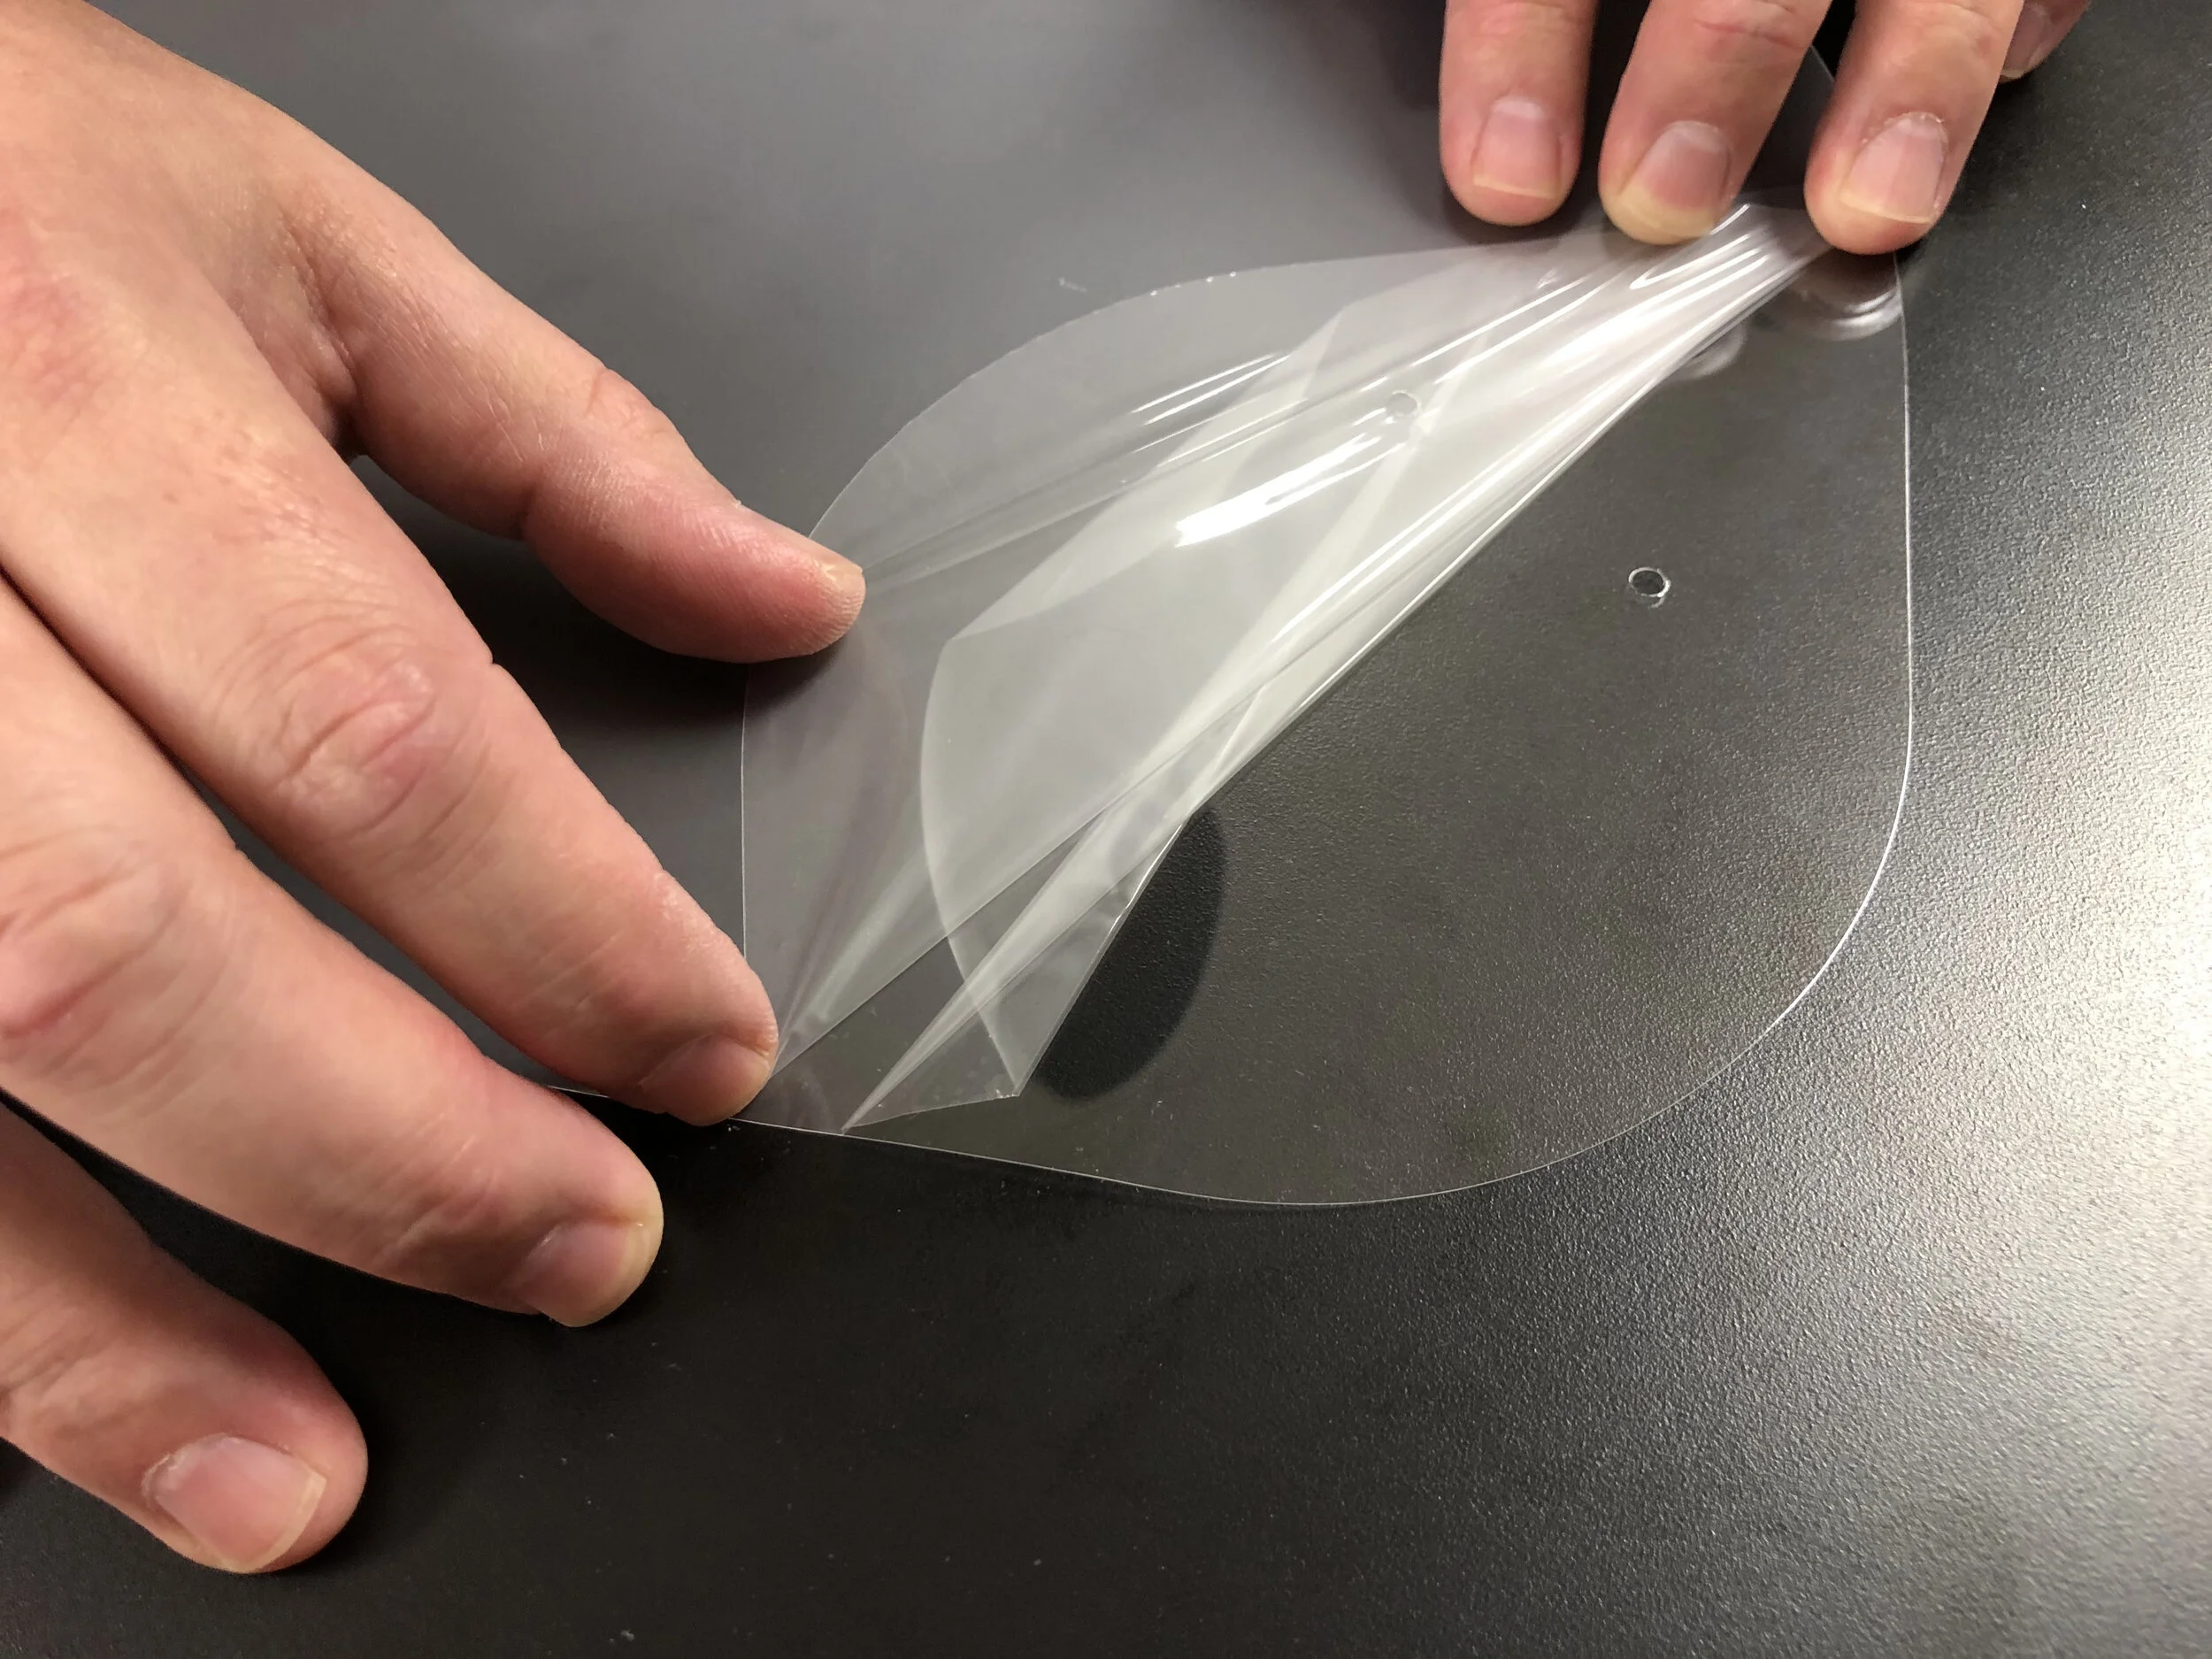
Wizard-4k-Video-Background-Honeycomb-3840x2160-Orange.jpg

The “FACE SHIELD” PROJECT

How to MAKE A PPE FACE SHIELD USING YOUR WIZARD CMC


What You’ll Need

TOOLS:

  • Wizard Computerized Mat Cutter (CMC)

  • Leather (Hole) Punch (available through Amazon.com, McMaster-Carr, and others)

  • Scissors (or a utility knife)

  • Sharpie (marker)

Materials:

Project Files:

(Last Updated: 05/15/2020)

Z Series & 9000 Series Cutters:

8000 Series Cutters:


ATTENTION:

We highly recommend reviewing the Production Notes and Important Information provided below prior to cutting your first face shield. It contains helpful tips as well as important compliance and disclaimer information you should be aware of before proceeding.

Step-by-Step Instructions


Project Overview

The following components will be cut using your Wizard CMC:

  1. Spacers (matboard)

  2. Shield (transparent plastic sheet material)

  3. Headband & Stiffener (plastic sheet material)

The holes will need to be punched using a leather punch, and the Elastic strip will be cut using scissors.

NOTE: We recommend starting out by cutting and assembling one complete Face Shield until you are confident in the process. Then, you may wish to take a more production-oriented approach.


Step 1 - Cut The Spacers

To prevent scuffing or scratching of the transparent Shield material, it is important to create a Spacer that will prevent the footblock of the CMC from making contact with the surface of the transparent Shield material as it is being cut.

It is also necessary to use a Spacer when cutting the Headband and Stiffener components to prevent the material from distorting as it is being cut.

Provided is a template for each of the needed Spacers, which may be cut from any type of 4-ply matboard or other suitable material.

  1. Open each of the Spacer template files in FrameShop™: Shield-Spacer.wzx and Headband-Stiffener-Spacer.wzx

  2. Cut each of the Spacers (any variety of 4-ply matboard will work well for this).

When finished, you will have created two separate Spacers: one will be used for cutting the Shield component, and the other will be used when cutting the Headband and Stiffener components.

Note: If you’re using our older MatDesigner software, you will need to open the individual CutArt™ files (.wcx), and create your own Spacer templates and cut files for each of the components.

The Spacer openings are offset by 1/8” inch all the way around, so be sure that your cut profiles for the actual components are centered within these openings in the Spacers. Also, make sure to leave a minimum of 1/2” border on any one side (more if possible).


Step 2 - Cut the Shield Component

  1. Open the provided “Shield.wzx” file in FrameShop™.

  2. Place the sheet of transparent Shield material over the backing board (slipsheet) on the CMC. (We are using a 0.007” (7 mil) thick transparent PETG with a protective film.)

  3. Place the (Shield) Spacer you just created over the sheet of transparent material you are preparing to cut. Make sure it is oriented in the same direction as your Shield cut file. (We are cutting the artwork rotated 90º for optimized clamping of our 16” x 20” Spacer and material.)

  4. Adjust the cutting depth to the recommended setting. (The cutting depth should be set to allow the blade to extend all the way through the combined thickness of the matboard Spacer and the transparent Shield material, so that it slightly cuts into the backing board.)

  5. Cut the Shield component.

NOTE: Depending on the sheet size of your transparent Shield material, you may be able to cut multiple Shield components at a time. However, to do this you will need to create a new multiple-up layout with as many Shield components as will fit your sheet size. You will then also need to create a matching Spacer template that corresponds with your new multiple-up layout.

Using a larger sheet size for a multiple-up layout, we highly recommend taping the top and right hand edges of both the transparent Shield material and the Spacer to your backing board (slipsheet) to help prevent any unwanted movement while cutting. It is also advisable to set the cut order to begin in the upper right corner, and work from a top-to-bottom, and right-to-left cutting pattern.

With thinner material such as 0.007” (7 mil) or 0.010” (10 mil), we have also found that it is possible to stack and cut multiple sheets simultaneously. However, we do not recommend stacking more than 0.040” in total thickness of materials at one time.


Step 3 - Cut the Headband & Stiffener Components

The Headband and Stiffener components may be cut at the same time out of the same type of material. (We are using 0.030” PETG, however other materials may work as well.)

  • Open the provided “Headband-Stiffener.wzx” file in FrameShop™.

  • Place the sheet of material for the Headband and Stiffener over the backing board (slipsheet) on the CMC. (We highly recommend securing the top and right edges of the material and the Spacer to the board using masking tape.)

  • Adjust the cutting depth and cutting speed to the recommended settings. (We recommend slowing the cutting speed down to just 25% for cutting this extra dense material.)

  • Cut the Headband and Stiffener components.

NOTE: It’s also feasible to cut multiples of each of these components in the same cutting job using a multiple-up layout. However, you will also need to create a corresponding Spacer template for this that matches your multiple-up layout.


Step 3 - Mark the Hole locations

  1. Mark the hole locations on the Stiffener. There will be a total of 2 holes needed on the Stiffener component (see provided diagram showing the hole locations).

    • One hole is needed on each end of the strip of PETG, inset 1/2” from each end (and centered vertically within the width of the strip).

  2. Mark the hole locations on the Headband. There will be a total of 4 holes needed on the Headband component (see provided diagram showing the hole locations).

    • The first set of holes in the Headband are inset 1/2” from each end (and centered vertically within the width of the strip—exactly like the holes on the Stiffener).

    • The second set of holes in the Headband are inset 4” from each end (and also centered vertically within the width of the strip).

  3. Mark the hole locations on the Shield. There will be a total of 2 holes needed on the Shield—one hole on each side (see provided diagram showing the hole locations).

    • The holes are located 3” down from the top of the Shield (the side with the smaller radius on the corners), and are inset 5/8” from either side.

Helpful TIP:

If you plan to produce multiple Face Shields, you may want to create a matboard template for each of the components (Shield, Headband, and Stiffener), so that you can mark and punch the hole locations on your templates.

These templates will make it quick and easy to align the holes when punching additional pieces of each component in more of a production-style approach.


Step 4 - Punch the Holes

  1. Punch the holes in the Shield component using a leather punch set to a 5/32” hole size.

  2. Punch the holes in the Stiffener component with the same 5/32” hole size.

  3. Punch the holes located 4” in from each end of the Headband component using the same 5/32” hole size.

  4. Punch the other set of holes in the Headband that are located 1/2” in from each end using either 5/32” or an optional 3/16” hole size (larger holes will make it easier to thread the Elastic through, and also allows for adjustments in the Headband to be made more easily in the finished product.)


Step 5 - Assemble the shield Components

  1. The Snap Rivets are made up of 2 separate pieces: the ‘Rivet’ and the ‘Pin’. Separate the two pieces of both Snap Rivets before starting the assembly process.

  2. Line up the one of the Headband holes that is inset 4” from the end with one of the holes in the Stiffener, and push the Rivet half of the Snap Rivet through the two holes from the Headband side out through the Stiffener side.

  3. Repeat this process for the other side of these two components (Headband and Stiffener).

  4. If the transparent Shield material has protective film applied, peel back the corners of the protective film on both sides of the Shield component, but just around the holes. Keep this protective film applied to the Shield to protect it until all of the assembly process is completed.

  5. Now attach one side of the Shield by pushing it onto the Rivet. You will need to hold all of these components together on the side you’re working with.

  6. Next, place a Washer onto the Rivet from the outside over the top of the Shield component. This Washer is an important component, because it helps to hold everything together, and ensures the Shield will not pull through the Snap Rivet.

  7. Finally, push the Pin half of the Snap Rivet through the Rivet from the Headband side, until it ‘pops’ into the washer on the opposite side (the Shield side). You will notice that it causes the Rivet to flare out, holding the Washer and all of the components together.

  8. Repeat steps 4 through 6 to attach the other side of the components.

Your Face Shield is nearly complete at this point! There’s just one more step remaining.


Step 6 - Thread Elastic through The Headband & Buckle

  1. Cut a length of Elastic band to at least 12” long using a pair of scissors.

  2. Thread the Elastic band through both of the end holes on the Headband (from the inside-out).

  3. Loop one end of the Elastic band through one end of the Buckle, over the center divider in the Buckle, and back out through the other end of the Buckle. The Buckle is now attached to one end of the Elastic band.

  4. Take the other end of the Elastic band, and overlap the end you just threaded onto the Buckle—being sure to loop it through one end of the Buckle, over the other end of the Elastic band, and back through the other end of the Bucklethe ends of the Elastic should overlap each other.

When finished, one end of the Elastic band should be accessible from the outside of the Headband, and the other end of the Elastic will be on the inside of the Headband.

The Headband is adjustable by pulling on either end of the Elastic band to tighten it.


Finished Face Shield

Congratulations! Your completed Face Shield should look like this. The Shield (together with the Stiffener) also pivots to provide convenient access to the face without having to remove the entire Face Shield.

 
Wizard-4k-Video-Background-Honeycomb-3840x2160-Black.jpg

Where to buy the materials

Shield Material

We recommend PETG which is available through a variety of sources online, and may be available through other local sources in your area. PETG stands for Polyethylene Terephthalate Glycol-modified, which is considered a food-safe plastic, and comes in various thicknesses, sheet sizes, rolls, and quantities. Try searching online using the following types of phrases: PETG Clear Sheet .007, PETG Clear Sheet .010, or PETG Clear Sheet .020, etc.

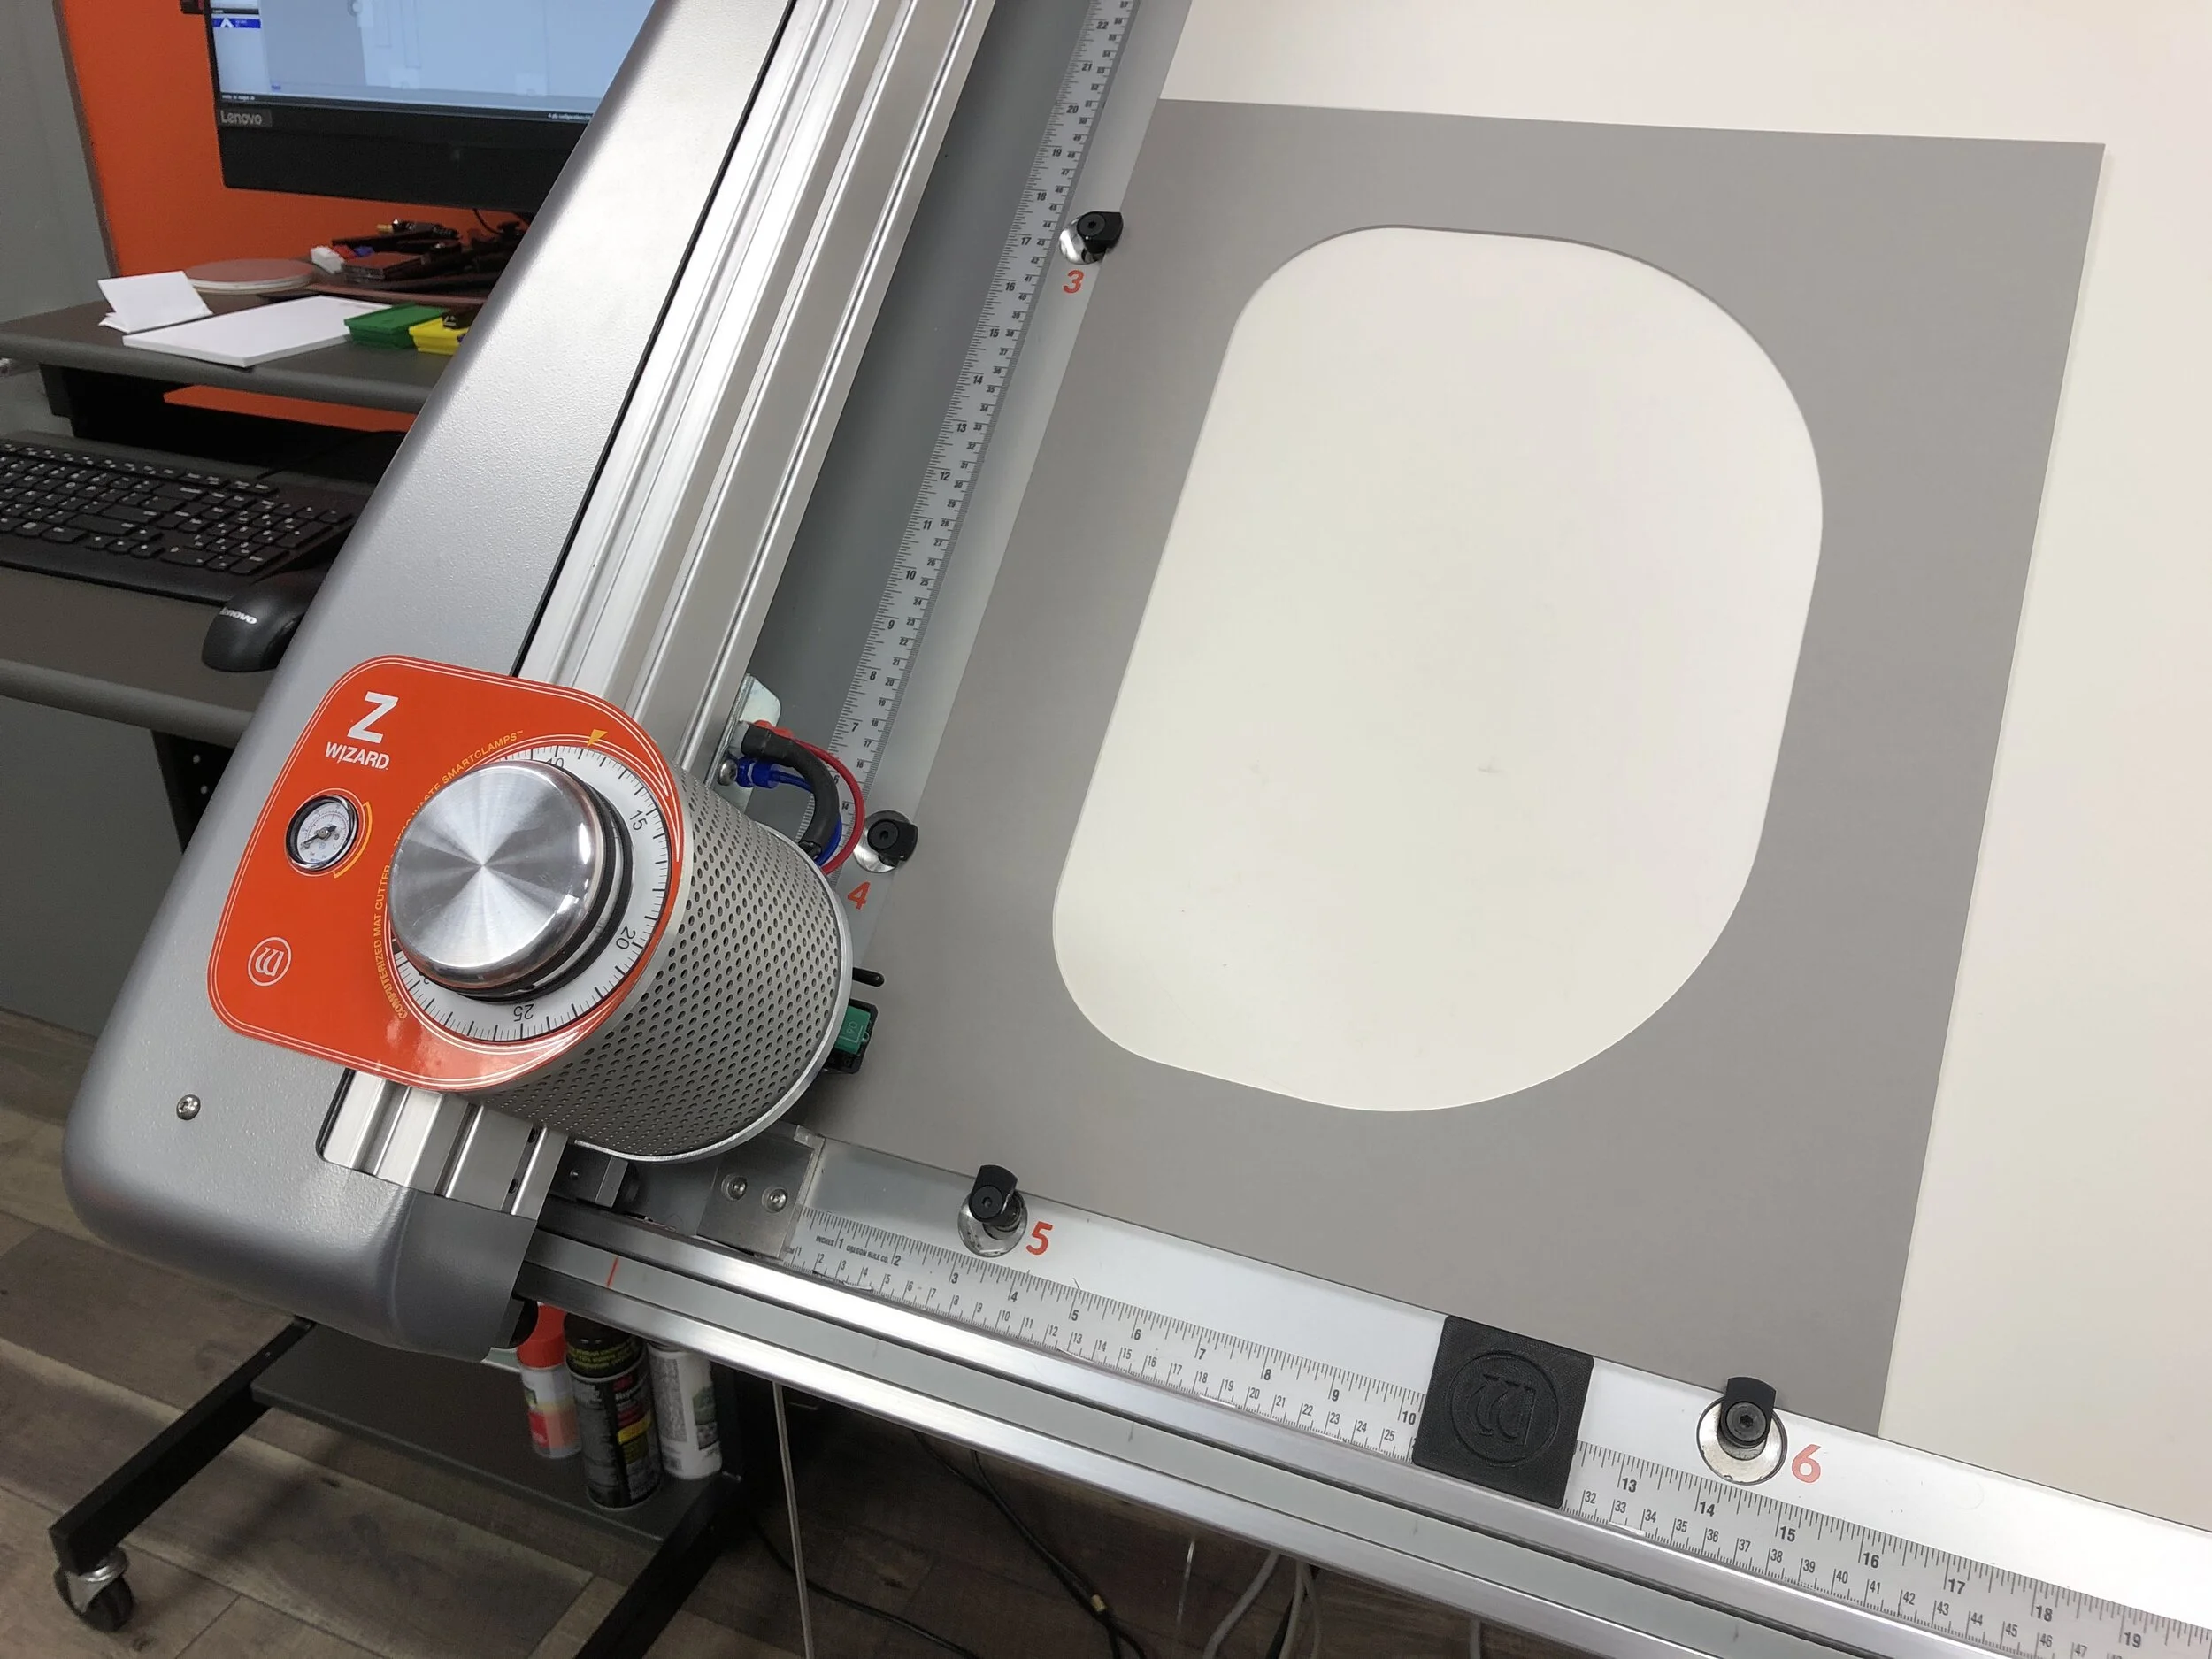
Note: You will need a minimum sheet size of approximately 16” x 20” to cut one Shield component. We used 0.007” thick transparent PETG for cutting the Shield. Depending on the thickness of your transparent Shield material, the Headband and Stiffener components may also be cut from the same material. However, you will need to experiment to determine the ideal material thickness that will accommodate all of the various components.

If you change the thickness of your sheet materials, you may also need to get different snap rivets and/or washers to accommodate the new overall thickness of the three components: Shield, Headband, and Stiffener. Also, if you’re using a thicker material for the Shield, you may find that the Stiffener is no longer necessary. (PETG is the recommended material, however other transparent materials such as Polycarbonate or Polyester may also work.)

Headband & Stiffener Material

We also recommend PETG for the Headband and Stiffener components, however it does not need to be transparent (although this is always an option). For these components, we used 0.030” PETG ‘Shim Stock’, which is a variety of PETG that has worked well for this application. It comes color-coded based on the thickness of the material (0.030” is orange or “coral”).

PETG is available through a variety of sources online, and may be available through other local sources in your area. PETG comes in various thicknesses, sheet sizes, rolls, and quantities. One source to consider is McMaster-Carr. You may also wish to try searching online using the following types of phrases, depending on the specific material you want to use: PETG Sheet .020, or PETG Sheet .030, etc.

Note: For convenience, the provided cut files for the Headband and Stiffener are setup together on the same template using a sheet size of 16” x 20” to match the size of the sheet used for the Shield. However, producing one set of the Headband and Stiffener components will not actually require that large of a piece. We used 0.030” thick PETG ‘Shim Stock’ for cutting the Headband and Stiffener. (It is not a requirement to use PETG—other types of materials may also work well.)

Rivets

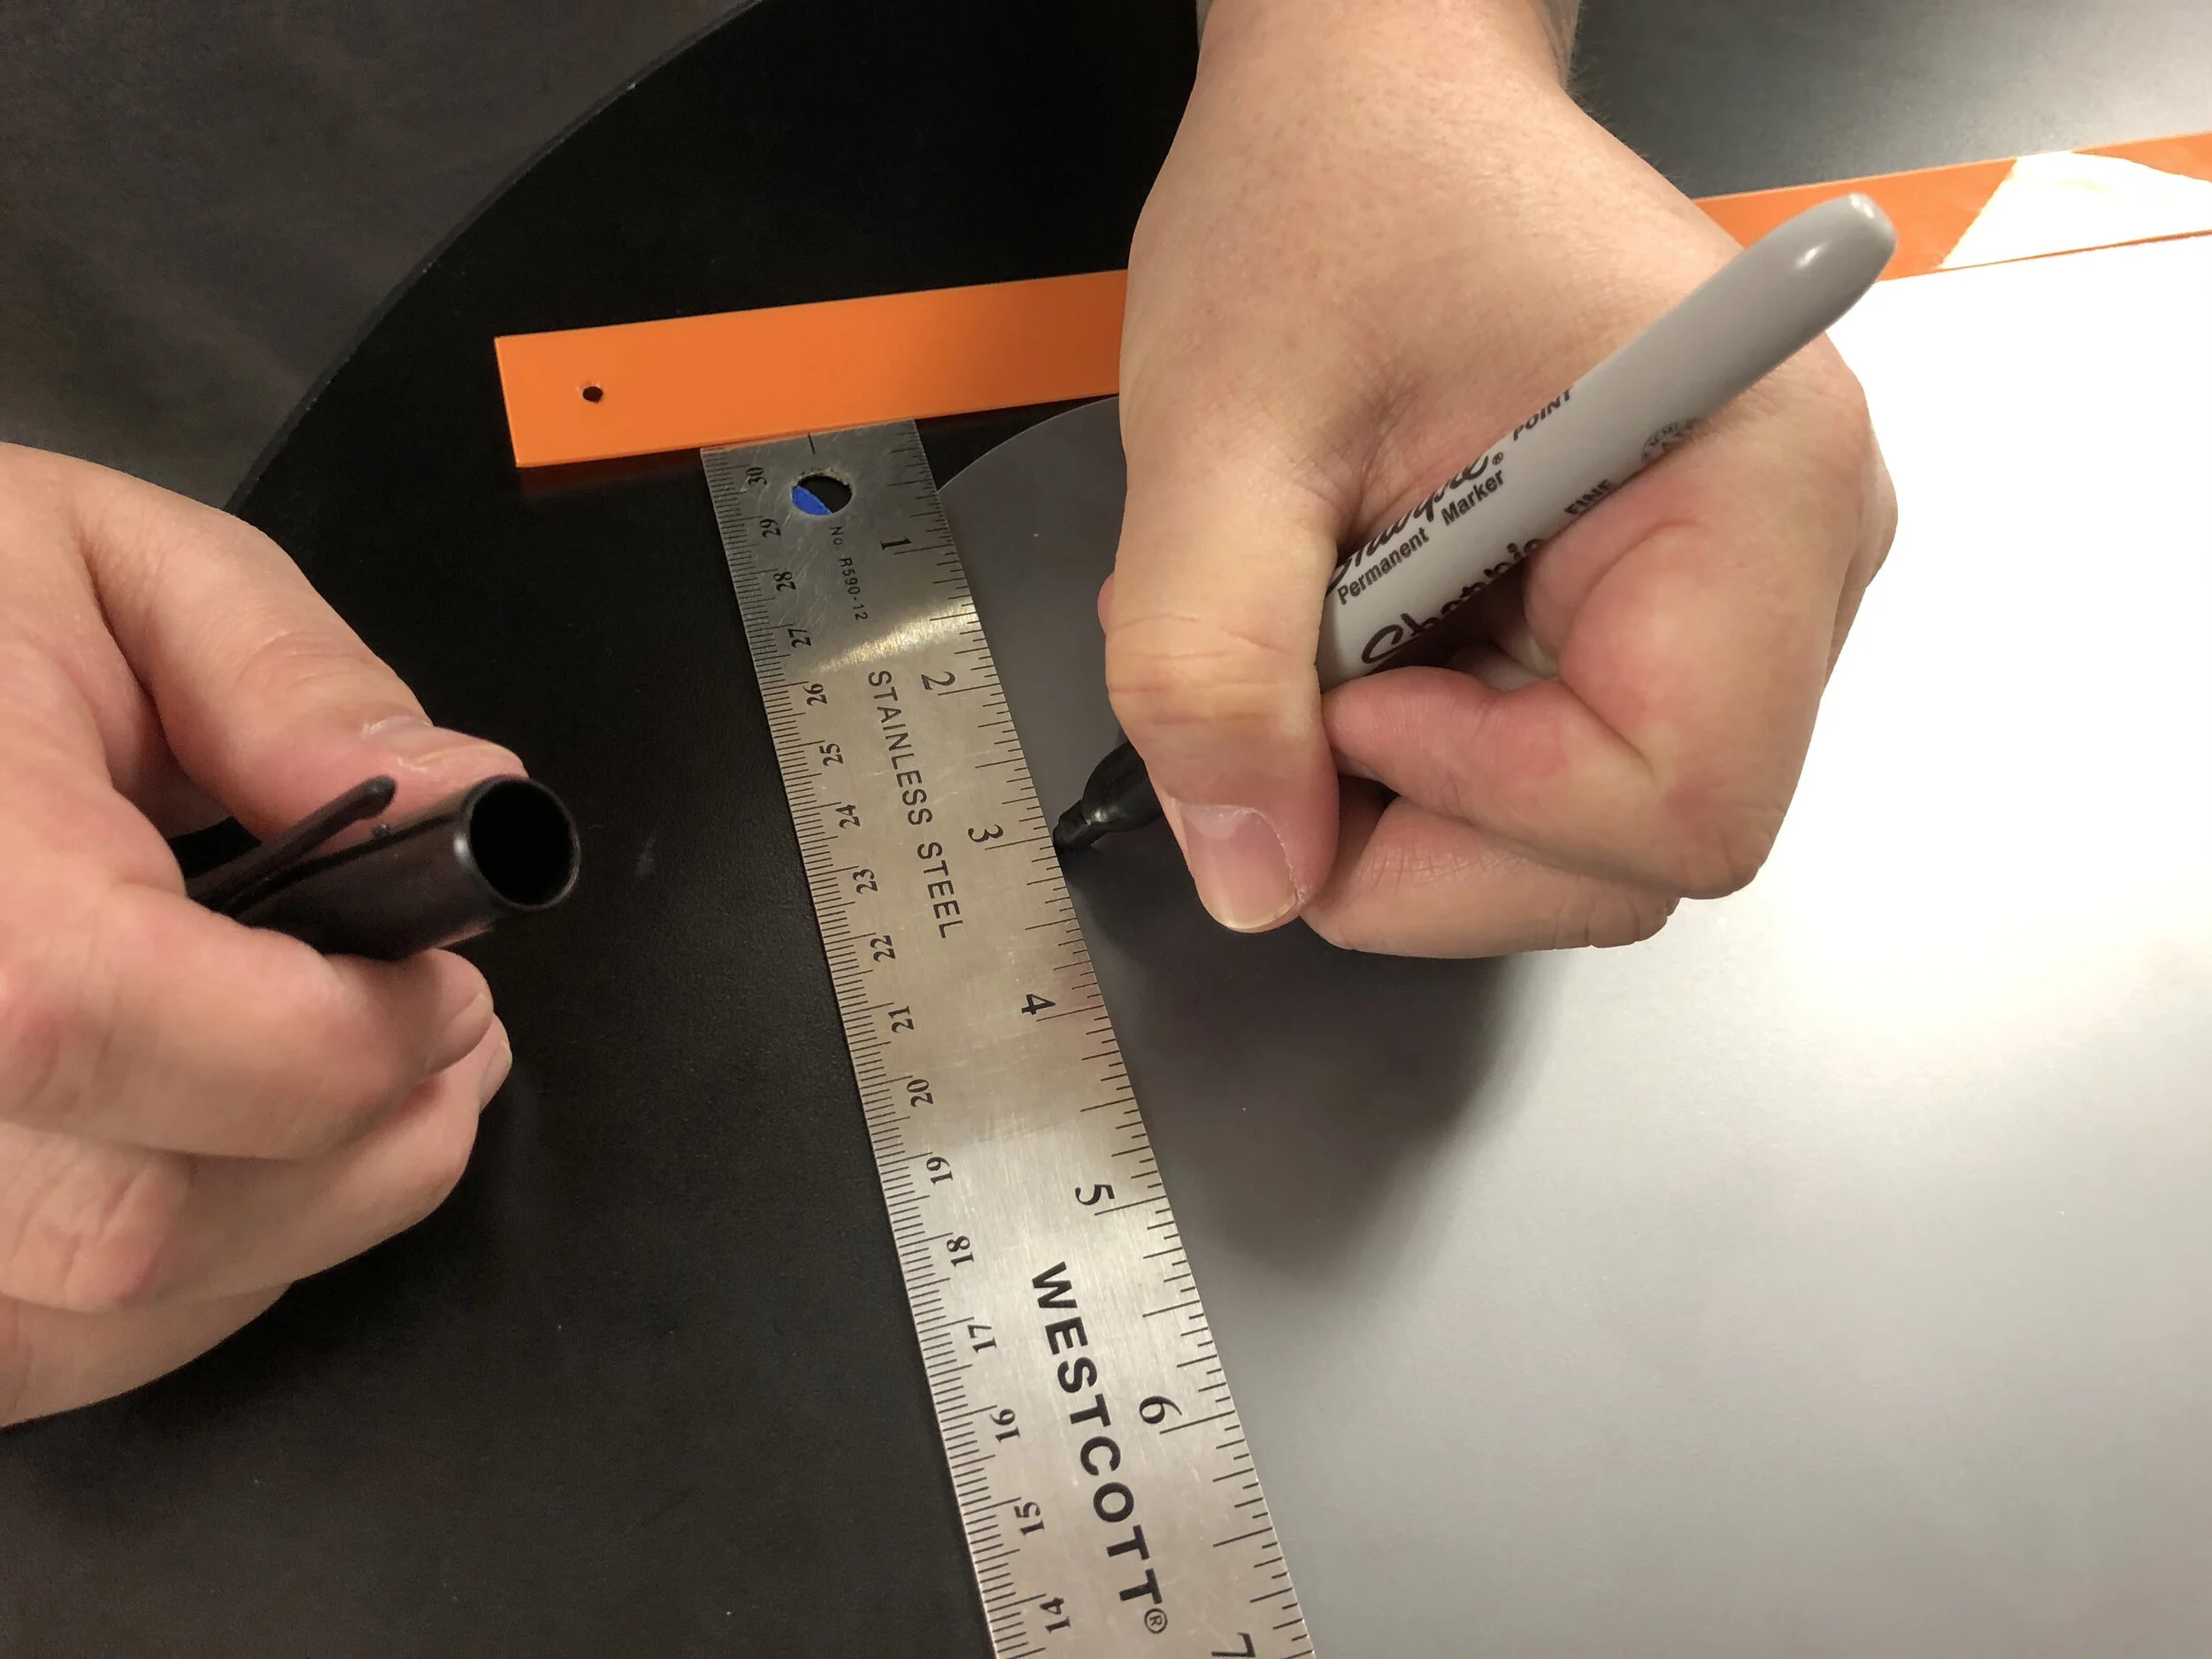
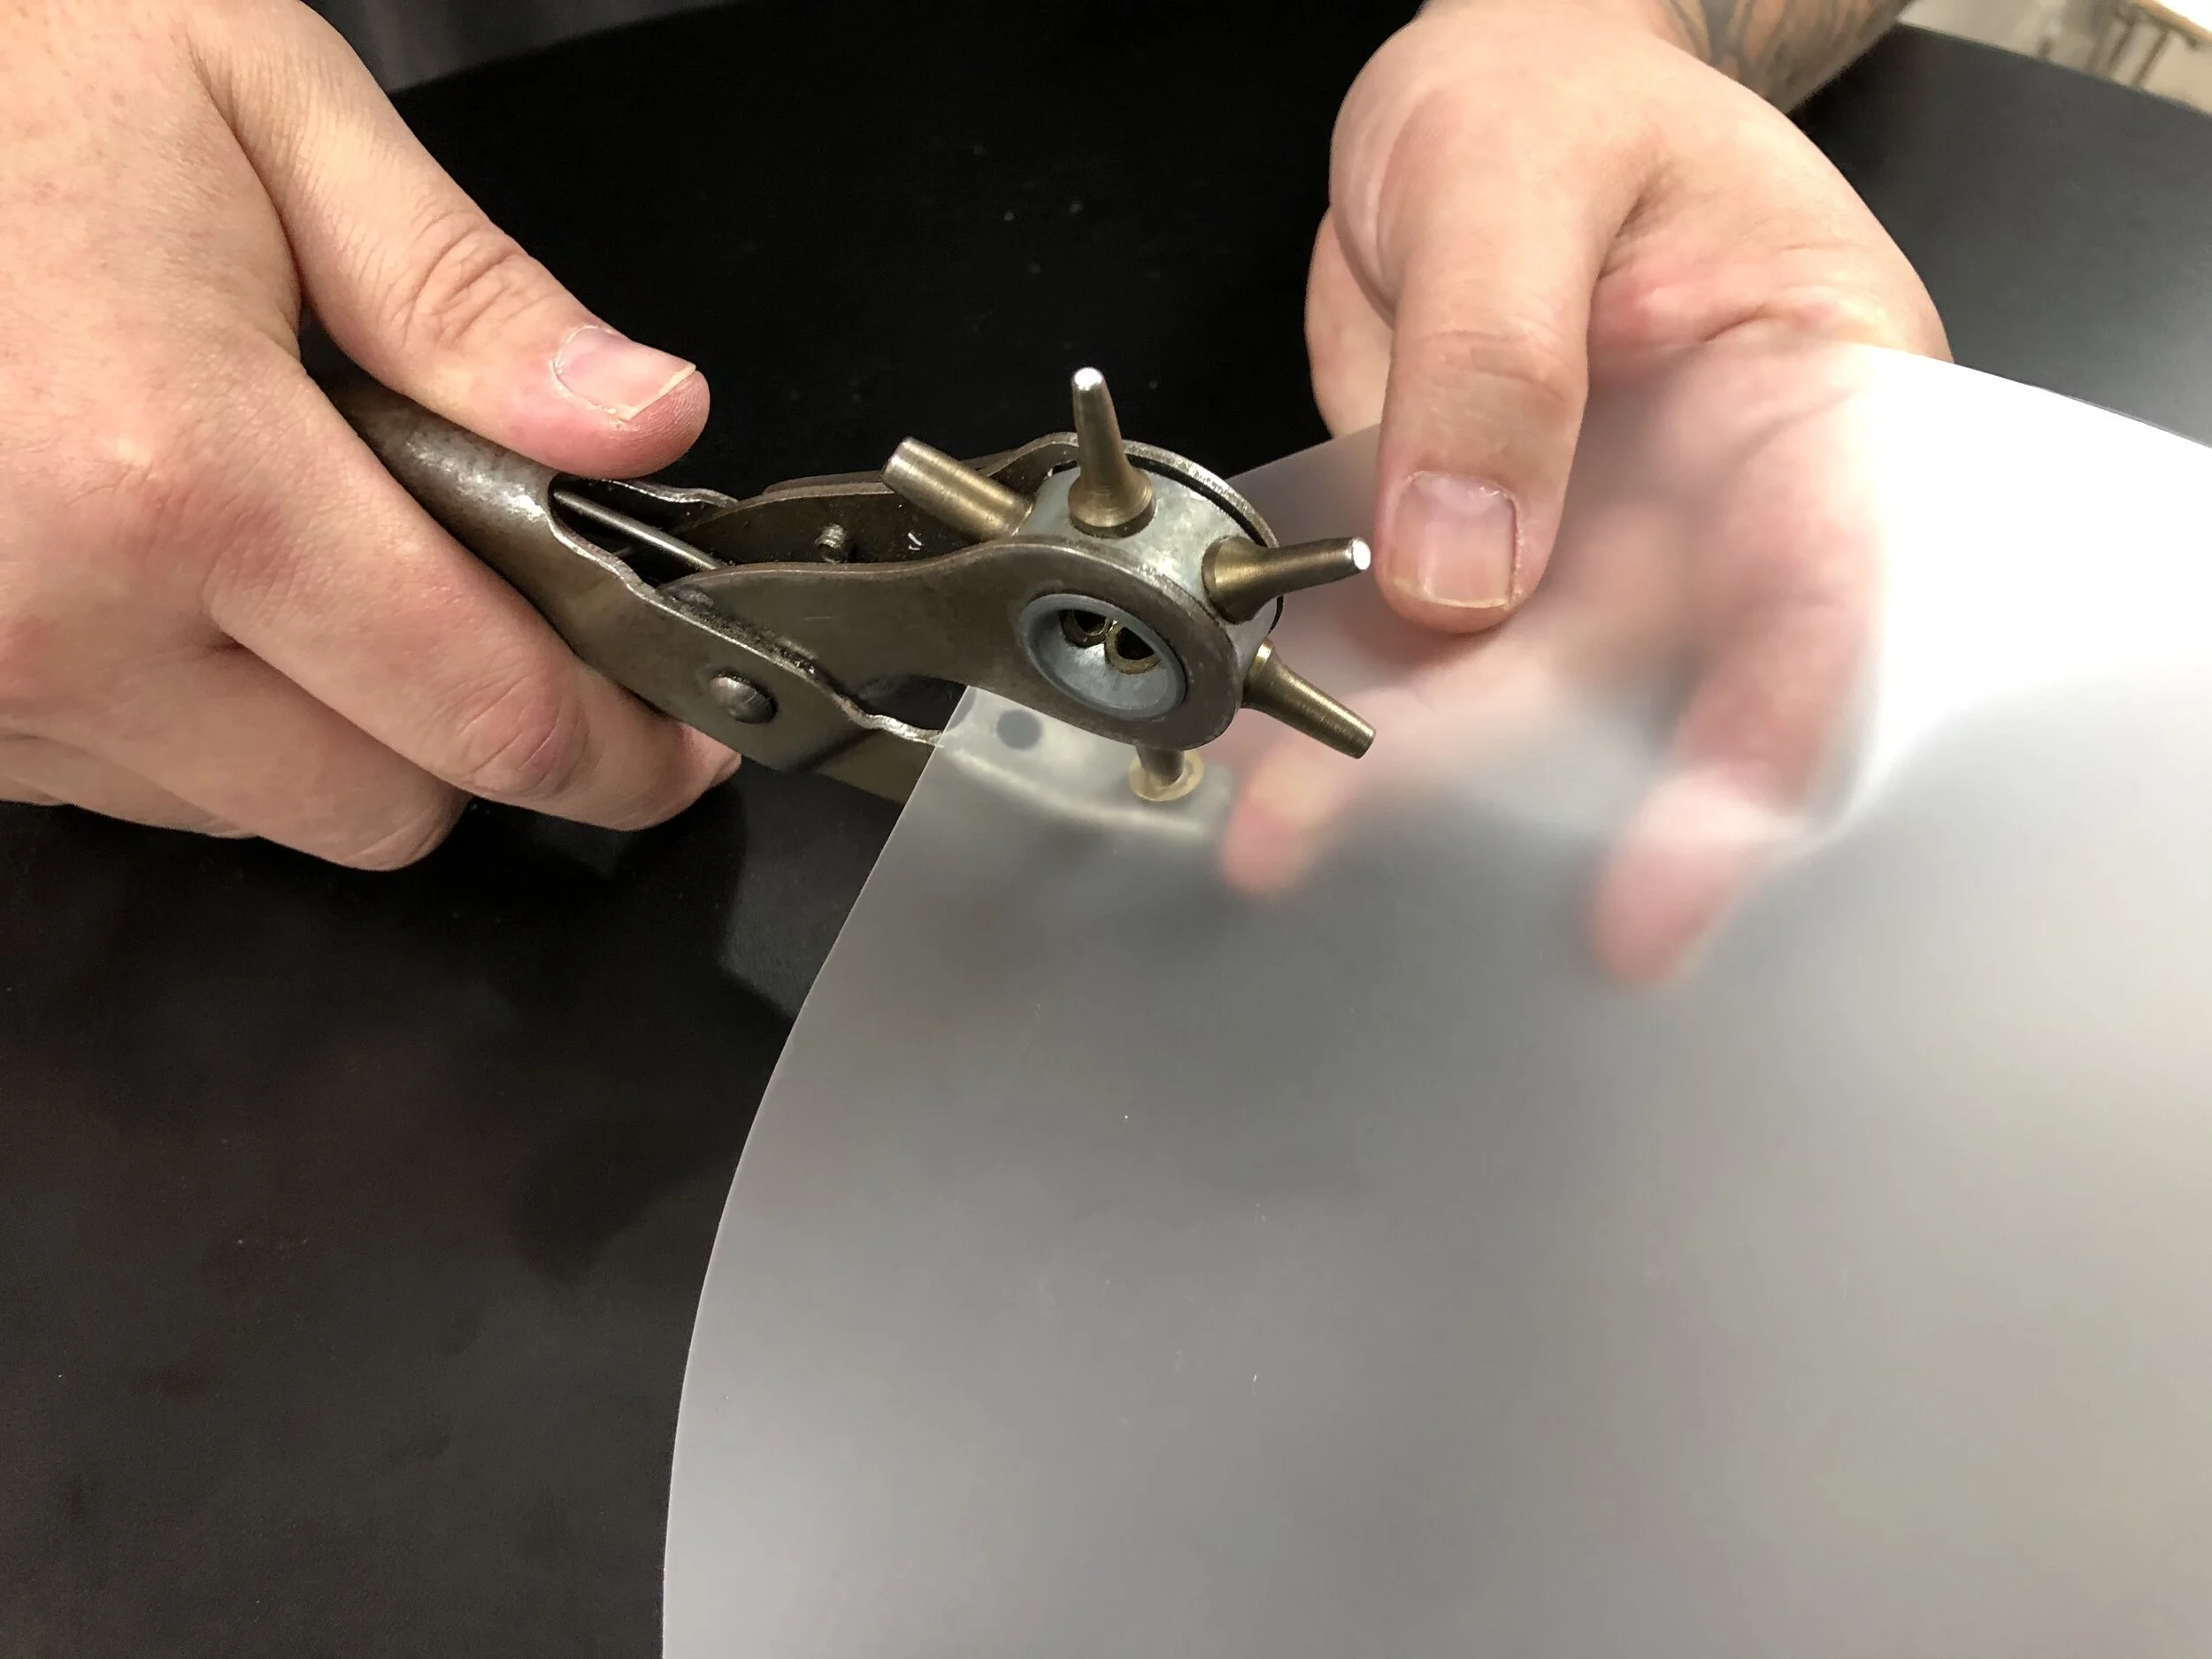
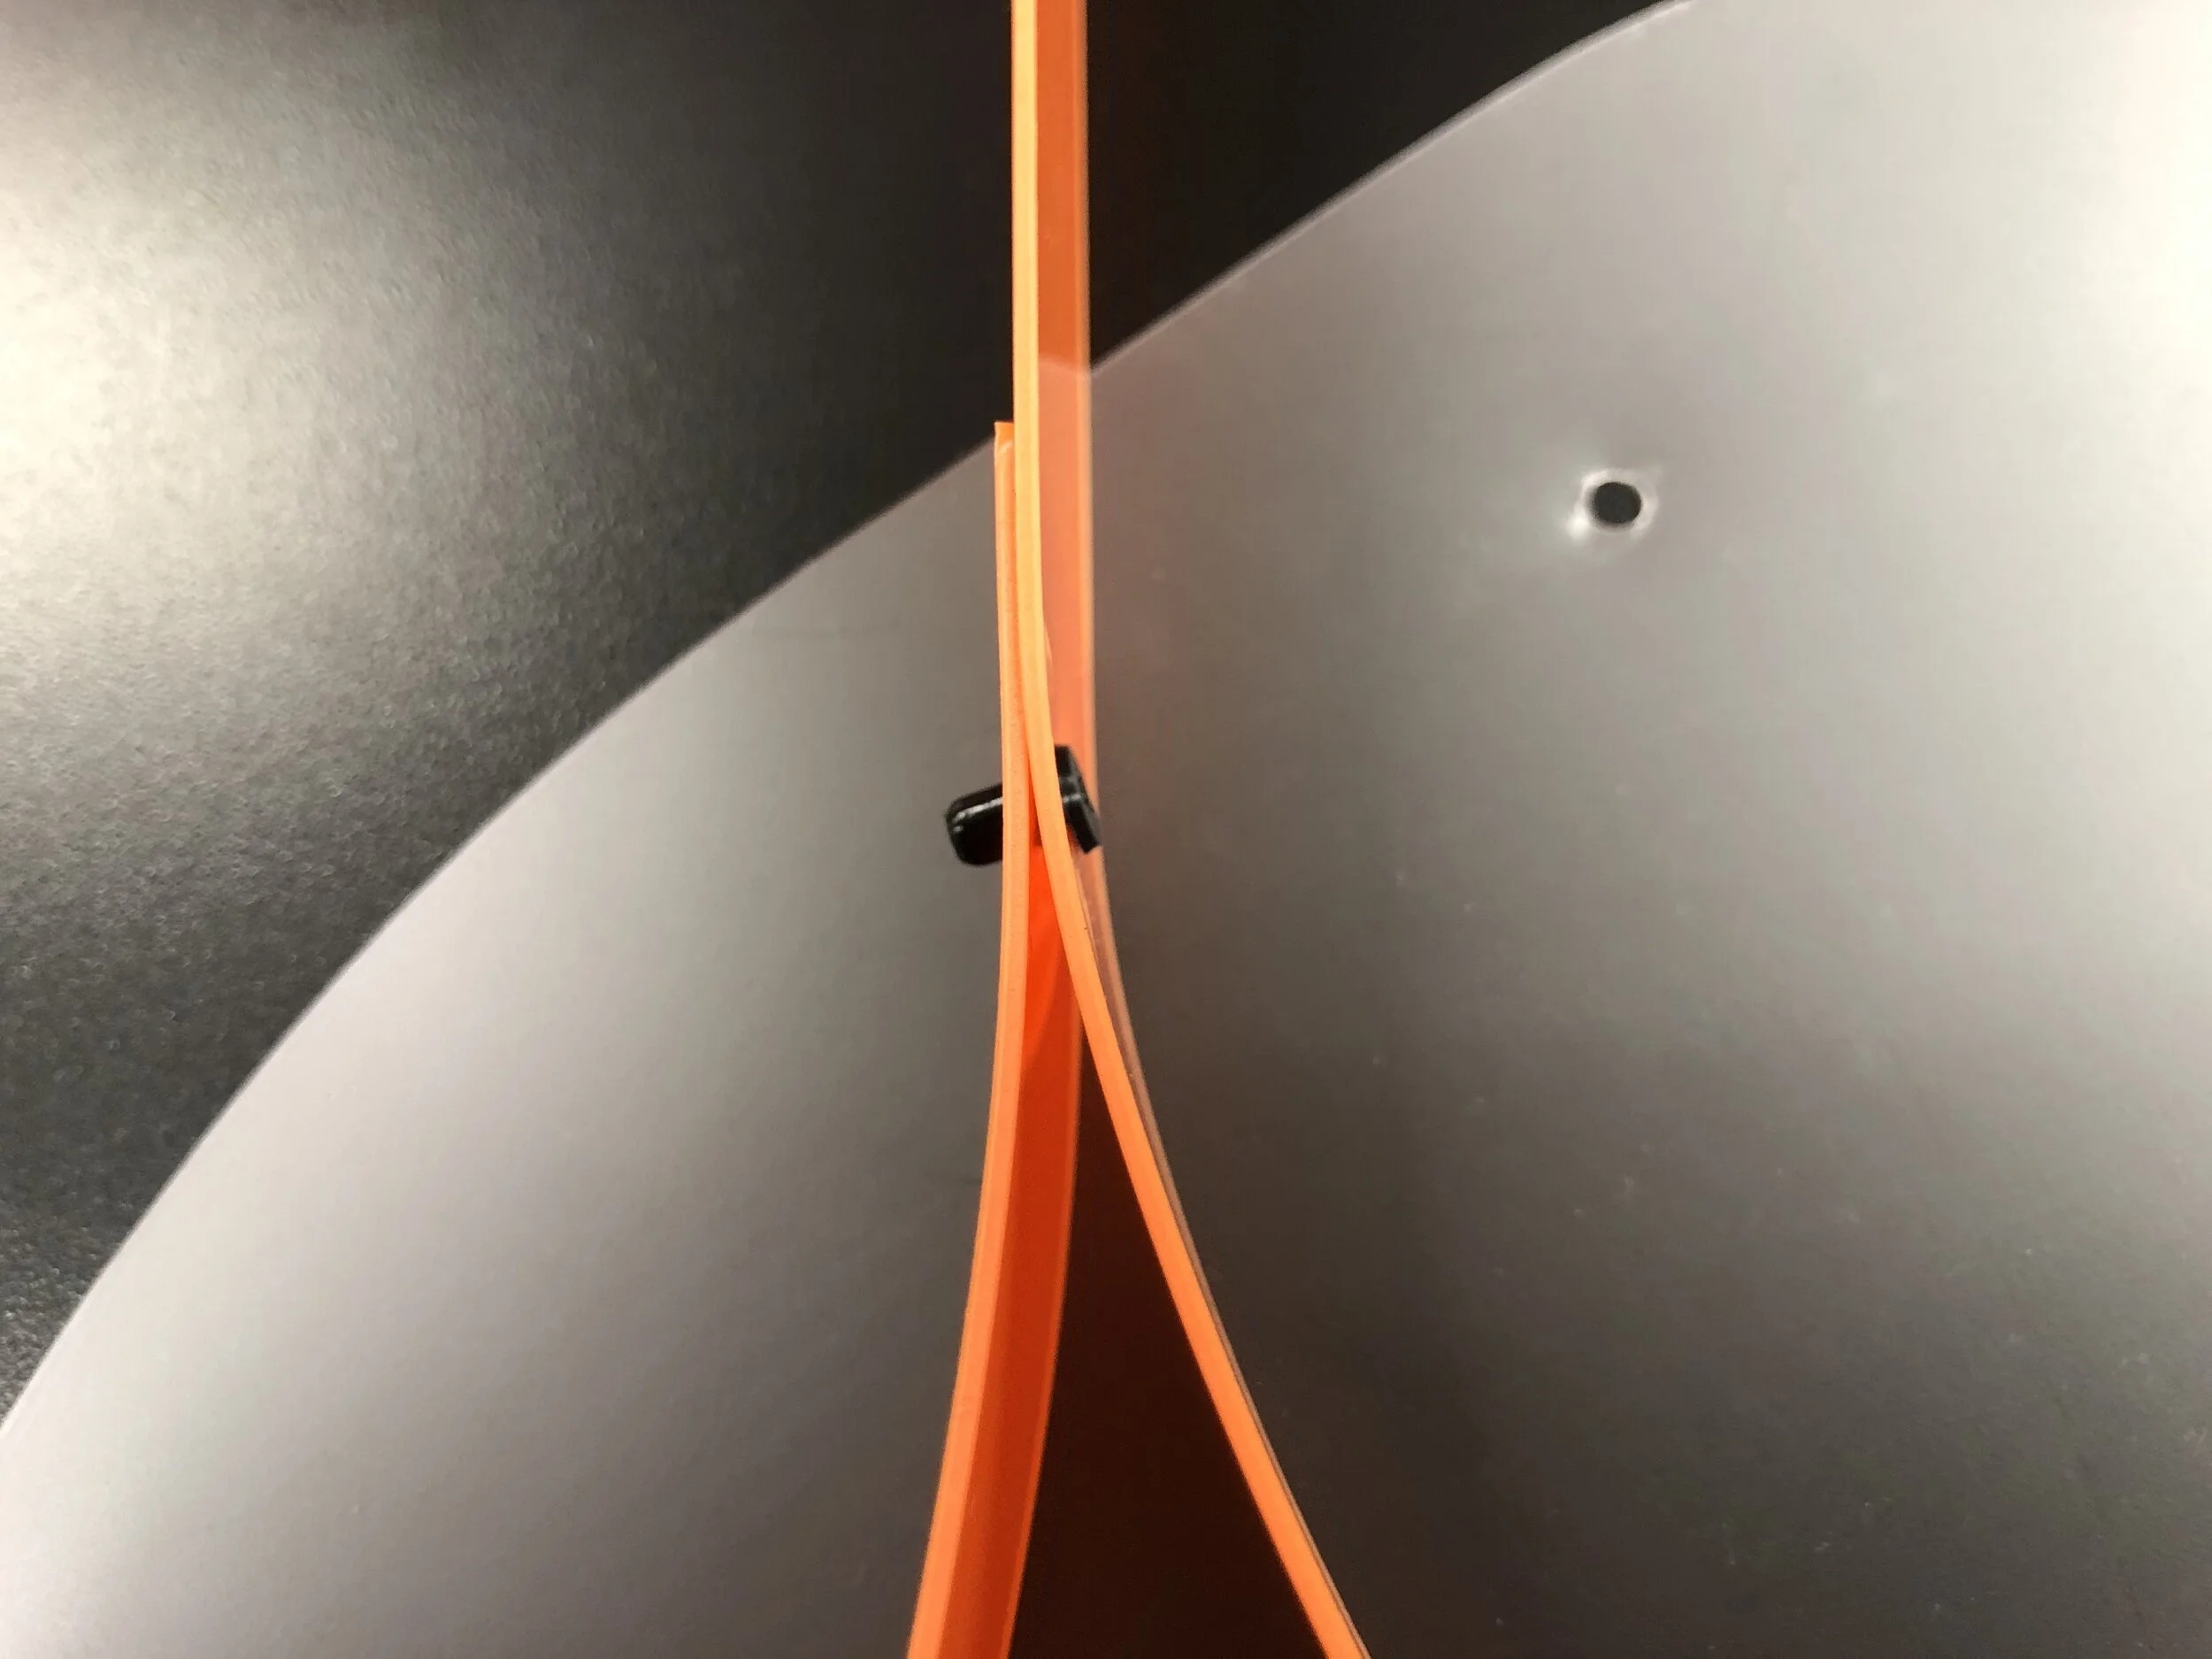
You will need a quantity of 2 rivets per face shield. The plastic snap rivets we used can be sourced from McMaster-Carr, Part Number: 91020A198

Specifications: 0.161” hole size, lg. 0.020” for material 0.1” - 0.014” thick.

Note: Use of thicker material for the face shield, stiffener and head band may require a different size rivet to accommodate the additional overall material thickness.

Washers

You will need a quantity of 2 washers per face shield. The plastic washers we used are 0.156” inner diameter, and can be sourced from McMaster-Carr, Part Number: 90295A380

Specifications: Nylon, 0.156” (inner diameter) x 0.312” (outer diameter) x ~0.030” thick.
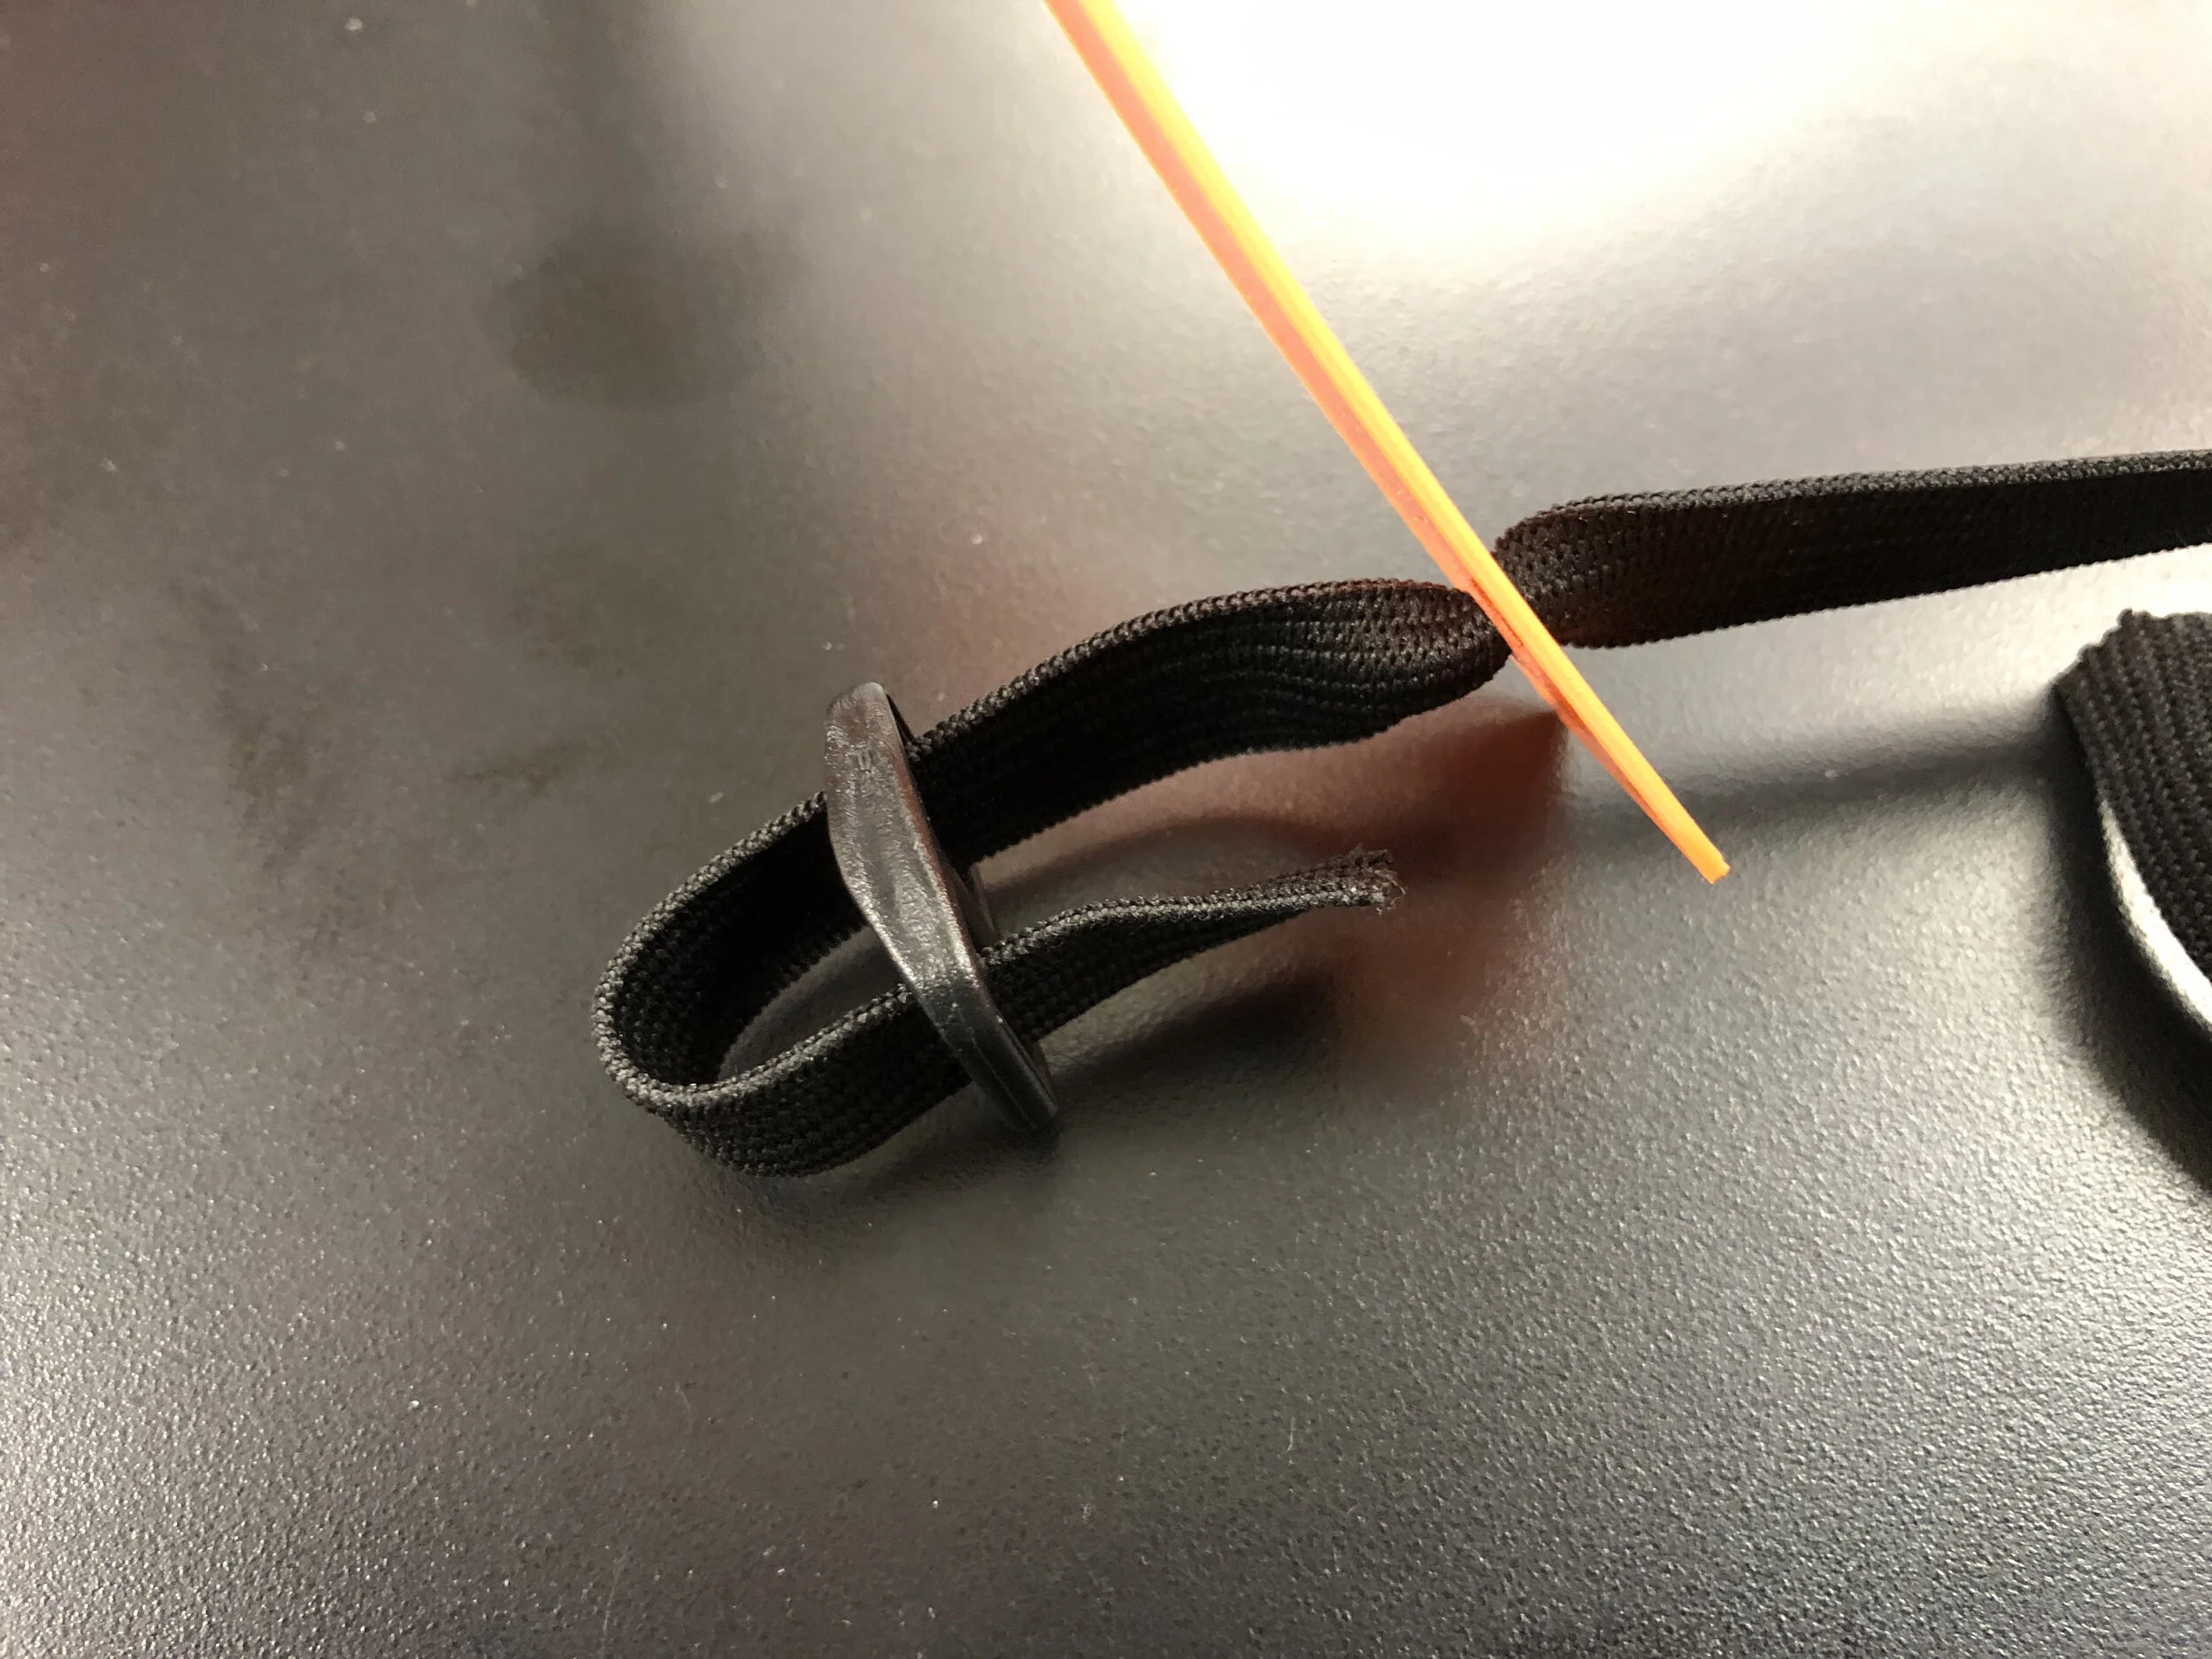
Elastic Band

The Elastic band material can be purchased at most any fabric store, craft store, or online. Here are some options available through Hobby Lobby and Amazon.com, but there are many other sources to consider.

Specifications: 1/2” Wide (a minimum of 12” per Face Shield is required)

BUckle

The Buckles can be purchased online through a number of sources, and there are many variations of these that will work, including some that come as a two-part buckle that snap together with a side quick-release, and others that feature a cam-lock style connection. The style of buckle shown in our design is a simple Widemouth Triglide Slide style that is available through Amazon.com, but there are likely many other sources for these.

Specifications: 1/2” Plastic, Widemouth Triglide Slides—Feed-through Style Buckle

Wizard-4k-Video-Background-Honeycomb-3840x2160-Orange.jpg

Production Notes

There are numerous ways this Face Shield design may be modified to fit your needs. You can easily change the shape of the Shield by using FrameShop Trace (or Pathtrace if you’re using MatDesigner).

You can also adapt it to use a shoelace instead of an Elastic band in the back. (During our prototype development, we’ve even used rubber bands to hold it on.) And, depending on the type of material and thickness you’re using for the Shield component, the Stiffener component may or may not be necessary.

We’ve also successfully cut multiple layers of the thinner transparent Shield material at once. However, you will need to adjust the depth of cut in order to do this.


Cutting one sheet at a time, you should set the depth on your CMC according to the combined thickness of the material you’re using plus the thickness of your Spacer. The cutting depths suggested below are provided as a starting point, based on the specific materials used in our product development and testing process. We recommend testing these yourself to find the optimal settings for your combination of materials and cutting environment.

NOTE: Each segment on the Wizard CMC cutting depth dial represents 0.007” in blade depth.

  • For the 0.007” (7 mil) thick Shield material, plus the (4-ply matboard) Spacer, a cutting depth setting of 11 or 12 is suggested. This material cuts well with the CMC running at full speed.

  • For the 0.030” (30 mil) thick Headband & Stiffener material, plus the (4-ply) matboard Spacer, a cutting depth setting of 19 or 20 is recommended. This material should also be cut using the “Extra Dense Material” setting with the cutting speed reduced to just 25%.

When using the thinner (0.007” or 0.010”) PETG material, we have found that it is possible to stack and cut multiple sheets simultaneously. However, we do not recommend stacking more than 0.040” in total thickness of materials at one time.


Spacers

We noticed that a dirty footblock can scratch the material. Cleaning your CMC’s footblock before cutting is highly recommended. We also suggest creating and using a matboard Spacer to protect your transparent Shield material by preventing the footblock from contacting it while cutting (instead the footblock travels over the surface of the matboard Spacer). In addition, the Spacer helps to hold the material in place and prevent unwanted movement as it’s being cut. The transparent PETG Shield material is also available with a protective film that can help keep it from being scratched during cutting, handling, assembly, etc.

It is also necessary to use a Spacer when cutting the Headband and Stiffener components to prevent the material from distorting as it is being cut—particularly as the cutting head reaches the end of a long cut on a thin strip of material such as the Headband or Stiffener components.

Place the applicable (matboard) Spacer over the sheet of material you are cutting, and it will help to hold the material in place, as well as keep the footblock from making contact with the surface of the plastic as it’s being cut.

Note: you’ll need to adjust the depth of cut to account for the overall thickness of your Spacer and material.

Stiffener

One of the lessons we learned along the way was that, by using a thinner transparent material for the Shield, a thicker Stiffener component will keep the Shield from flaring out and creating a cone at the top. Our focus group found this to be preferable in the finished product.

Other types of materials may be used for the Stiffener component, provided that the rivets holding the various components together do not tear through it. You may wish to experiment with various options to see what alternative materials work best.

Headband

For added comfort, Headband may be wrapped in cloth, or foam padding may be applied to the inside of the Headband. Be aware that some people are allergic to latex and other similar products, so your choice of materials used should be researched, tested, and validated prior to mass production or distribution.

Other types of materials may be used for the Headband component, provided that the rivets holding the various components together do not tear through it. You may wish to experiment with various options to see what alternative materials work best.

Rivets

You may be able to find a local supplier for the Plastic Snap Rivets. If they are not available in the specified size, don’t worry. You can simply change the size and location of the holes as needed to accommodate the different size rivets you’re using.


Important Information

If you intend to produce Face Shields for sale as Personal Protection Equipment (PPE) for use by healthcare providers, you will need to ensure compliance with the FDA’s Emergency Use Authorization guidelines. By doing so, you may become eligible for consideration as an “essential business”. However, please check with your local authorities on the criteria and necessary procedures prior to re-opening your business.

DISCLAIMER: Wizard assumes no responsibility for ensuring compliance with these FDA guidelines nor eligibility to be considered an ‘essential business’, and assumes no liability for the provided face shield design—use it at your own risk and discretion.

Further, Wizard does not make any claim or warrant that our face shield design or specifications will prevent infection from microbes or viruses, or that it is in any way effective against radiation or in preventing the spread of COVID-19. By accessing, downloading, or using the provided design, specifications, or any of the information contained in this website, user assumes all liability and agrees to indemnify and hold harmless Wizard International, including its officers, employees, and agents from and against any and all claims. If you agree to this, please proceed. We wish you success and happy cutting!